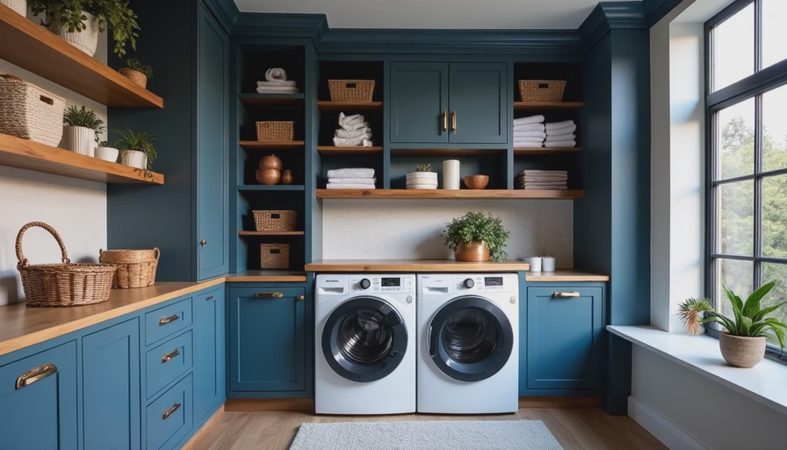
A laundry room organizer is not just a way to hide detergent bottles before guests arrive. Used properly, it can keep supplies off the floor, preserve access to shutoff valves, and reduce the small maintenance mistakes that turn into expensive water damage. After years inspecting claims, I look at laundry storage differently. The prettiest shelf in the world is still a bad shelf if it blocks the washer outlet or encourages you to stack heavy items above your head.
My wife, Rachel, and I started with a washer and dryer shoved into a dark corner of our unfinished basement. The room was cold, crowded, and unpleasant enough that we avoided it between loads. A room you hate to be in is a room you'll never take care of. The goal was not a magazine spread. It was a safer, brighter work zone that made routine inspections easy.
Start With a Safety-First Layout
Before buying a laundry room organizer, measure the machines, doors, hoses, vents, and walking clearance. Leave enough room to pull the washer forward and inspect both supply connections. Do not build a fixed cabinet over a machine if it prevents you from reaching the water shutoff or electrical connection. In a basement, keep cardboard boxes, paper towels, and spare linens away from the floor and from the furnace or water heater.
A basic wall-mounted shelf often costs $40 to $120, while a sturdy cabinet system can run from $250 to more than $1,000. The expensive option is not automatically better. I would rather see a $75 open shelf installed safely than a $900 cabinet that hides a slow leak for six months.
Use a moisture-resistant material near the sink and washer. Painted plywood, sealed solid wood, and quality laminate can work well. Unsealed particleboard swells quickly after a splash or leak. If you store cleaning products above the machines, install a lip or use bins so a bottle cannot slide behind the dryer.

Put Water-Damage Prevention on the Shopping List
The most useful laundry room organizer includes a place for inspection, not just a place for storage. Keep the washing machine hoses visible and avoid cramming baskets against them. I recommend braided stainless-steel hoses instead of old rubber hoses, and I replace them when they show corrosion, bulges, or damaged fittings. No organizer can compensate for a hose that has been ignored for years.
Add a shallow plastic tray beneath the washer if the floor and machine configuration allow it. A tray will not stop every flood, but it can catch a small drip and direct attention to the problem. A water-leak sensor near the washer is another inexpensive layer. Basic models often cost $15 to $40, while connected sensors from brands such as Resideo or Moen can send an alert to a phone.
Keep the main water shutoff clearly labeled. Do not bury it behind a permanent cabinet or a pile of detergent. In a real emergency, you want to turn the valve quickly, not search through three shelves while water runs across the basement floor. One claim I handled involved a burst supply line that ran for hours because the homeowner could not find the shutoff. The damaged flooring, drywall, and personal property pushed the bill into the five-figure range.
Make Small Laundry Rooms Work Harder
A narrow closet needs vertical storage. A 10-inch-deep shelf above the machines can hold detergent, dryer sheets, stain remover, and spare filters without stealing walking space. Use clear bins with simple labels. That sounds fussy until you are trying to find oxygen bleach while holding a wet load against your hip.
A rolling cart is useful when wall space is limited. Choose a metal or sealed plastic cart that fits between the washer and wall, but measure first. Some carts advertised for laundry rooms are less than 6 inches wide and tip easily when loaded with large detergent bottles. A three-tier cart in the $25 to $60 range is usually more useful for small supplies than for heavy containers.
For folding, consider a counter above front-loading machines or a fold-down wall table. Anchor the table into studs, not just drywall. Leave enough room to open the washer door fully. If your machines are top-loaders, do not install a low counter above them; the lid needs unobstructed clearance.
A good laundry room organizer can also be a dedicated lost-sock station, a mesh-bag hook, and a narrow rod for air-drying shirts. These small additions eliminate piles that otherwise migrate to chairs, stairs, and bedroom floors.

Control Dryer Lint and Heat
Storage should never crowd the dryer vent or restrict airflow around the appliance. Clean the lint screen after every load, and vacuum the screen housing periodically. Check the vent hose for crushing, sharp bends, or accumulated lint. Flexible foil or semi-rigid metal ducting is generally preferable to flimsy plastic materials, but the installation still needs to follow local requirements and the dryer manufacturer’s instructions.
Do not store cardboard, aerosol cans, paper bags, or loose fabric directly behind the dryer. A dryer produces heat, and lint is combustible. I have seen fire damage spread through ceiling joists after a blocked vent overheated the appliance. The damage was not caused by a dramatic product failure; it started with neglected lint and poor clearance.
Install shelves to the side of the dryer when possible. If you must use overhead storage, keep it shallow and secure. A cabinet full of heavy detergent bottles should not be hanging from two drywall anchors. Use stud-mounted hardware and follow the weight rating. A $12 pack of proper anchors is cheaper than repairing a fallen cabinet and a cracked machine control panel.
Choose Storage That Survives Basement Moisture
Basement laundry rooms need materials that can handle seasonal humidity. Place a small hygrometer in the room; inexpensive models often cost under $20. If humidity stays high, improve ventilation or use a dehumidifier sized for the space. Do not rely on a shelf system to solve condensation, musty odors, or damp drywall.
An enclosed laundry room organizer can hide clutter, but it can also hide mold and slow plumbing leaks. Leave a little air space behind cabinets and avoid pushing bins tightly against exterior foundation walls. Store paper products in sealed plastic containers, and keep spare towels on an elevated shelf rather than directly on the basement floor.
If you have a utility sink, protect the cabinet base with a waterproof liner and keep the drain connection visible. A loose trap or supply fitting can drip for weeks. I use a flashlight and moisture meter during seasonal checks, especially after Buffalo’s coldest months, when frozen pipes and sudden thawing create extra stress on plumbing.
A Practical Buying Checklist
Before purchasing, measure the wall width, ceiling height, machine depth, door swing, and distance to the vent. Then confirm that your laundry room organizer will not block the shutoff, outlet, floor drain, or cleanout. Look for rust-resistant hardware, washable surfaces, rounded edges, and shelves rated for the actual weight of detergent bottles.
Start with the items that improve safety: a leak sensor, hose access, a labeled shutoff, and clear dryer ventilation. Next add a folding surface, a hanging rod, and bins for small supplies. Decorative baskets can come last. In our basement, the total project cost about $450 because we used a sealed wood counter, a wall shelf, metal hooks, and two plastic carts instead of custom cabinetry.
The result is not glamorous, but everything has a home and every important connection remains visible. That is the standard I want from a laundry room organizer: less clutter, faster inspections, and fewer chances for a minor problem to become a claim. Make the room pleasant enough to use, safe enough to inspect, and simple enough to maintain every week.